Creating custom shirt designs has never been easier with the rise of shirt transfers. Whether you're a DIY enthusiast or a professional looking to expand your business, learning how to make shirt transfers can open up endless possibilities for creativity and personalization. In this guide, we'll walk you through everything you need to know to get started.
Shirt transfers have become increasingly popular due to their versatility and ease of use. From custom sports jerseys to personalized gifts, the potential applications are virtually limitless. With the right tools and techniques, anyone can create stunning designs that stand out.
This article will provide a step-by-step guide on how to make shirt transfers, covering everything from choosing the right materials to applying the transfers to your fabric. We'll also explore various methods, tools, and tips to ensure your projects turn out perfectly every time.
Read also:Poppin Purple Lemonade The Ultimate Guide To This Refreshing Beverage
Table of Contents
- Introduction to Shirt Transfers
- Types of Shirt Transfers
- Materials Needed
- Designing Your Transfer
- Printing the Transfer
- Preparing the Shirt
- Applying the Transfer
- Tips for Successful Transfers
- Common Mistakes to Avoid
- Frequently Asked Questions
Introduction to Shirt Transfers
Shirt transfers, also known as heat transfers or iron-on transfers, are a popular method for adding custom designs to fabric. They allow you to print high-quality graphics, text, or images onto clothing items such as t-shirts, hoodies, and caps. The process involves printing the design on special transfer paper, which is then applied to the fabric using heat.
One of the main advantages of shirt transfers is their accessibility. Unlike other methods like screen printing or embroidery, transfers do not require expensive equipment or extensive skills. With just a printer, transfer paper, and a heat press or iron, you can create professional-looking results at home.
Why Choose Shirt Transfers?
There are several reasons why shirt transfers have become a favorite among hobbyists and professionals alike:
- Cost-effective: Transfer materials are generally more affordable than traditional printing methods.
- Versatile: You can create a wide range of designs, from simple text to intricate graphics.
- Easy to use: The process is straightforward and requires minimal setup.
- Durable: Modern transfers can withstand multiple washes without fading or peeling.
Types of Shirt Transfers
Not all shirt transfers are created equal. Depending on your needs and the type of fabric you're working with, you may want to consider different types of transfers. Below are the most common options:
Sublimation Transfers
Sublimation transfers are ideal for polyester fabrics. This method uses heat to transfer dye directly into the fibers of the material, creating vibrant and long-lasting prints. Sublimation transfers are often used for sports jerseys and promotional items.
Heat Transfer Vinyl (HTV)
HTV is a flexible material that can be cut into custom shapes and designs. It is applied to fabric using a heat press or iron and is particularly popular for creating bold, colorful graphics. HTV is great for small batches and detailed designs.
Read also:Fbsm In Sac A Comprehensive Guide To Understanding And Leveraging Its Potential
Inkjet Transfers
Inkjet transfers are printed using an inkjet printer and special transfer paper. They are suitable for both light and dark fabrics and offer excellent color reproduction. Inkjet transfers are a popular choice for DIY projects due to their affordability and ease of use.
Materials Needed
Before you start making shirt transfers, it's important to gather all the necessary materials. Here's a list of items you'll need:
- Transfer paper (inkjet or laser, depending on your printer)
- Inkjet or laser printer
- Heat press or household iron
- Shirt or fabric item
- Protective cover sheet
- Scissors or cutting mat (for trimming transfers)
Investing in high-quality materials can significantly improve the outcome of your transfers. For example, using premium transfer paper can enhance color vibrancy and durability.
Designing Your Transfer
The design is the heart of any shirt transfer project. Whether you're creating a logo, graphic, or text, taking the time to design it properly will ensure the best results.
Choosing the Right Design Software
There are many design tools available, ranging from free online editors to professional software like Adobe Illustrator or Photoshop. For beginners, platforms like Canva or Cricut Design Space offer user-friendly interfaces and pre-made templates.
Preparing Your Design
When designing for shirt transfers, keep the following tips in mind:
- Use high-resolution images to ensure clarity.
- Reverse or mirror your design if using inkjet transfer paper for dark fabrics.
- Consider the size and placement of the design on the shirt.
Printing the Transfer
Once your design is ready, it's time to print it onto transfer paper. Follow these steps for optimal results:
Using an Inkjet Printer
For inkjet printers, load the transfer paper into the tray with the coated side facing up. Print your design in reverse if applying it to a dark fabric. Allow the ink to dry completely before handling the paper.
Using a Laser Printer
Laser printers require special laser transfer paper. Load the paper into the tray with the coated side facing down. Print your design as usual, ensuring the printer settings are optimized for transfer paper.
Preparing the Shirt
Proper preparation of the shirt is crucial for successful transfers. Follow these steps:
- Wash and dry the shirt to remove any sizing or chemicals that may interfere with the transfer.
- Iron the shirt on a high setting to remove wrinkles and ensure a smooth surface.
- Place a protective cover sheet over the area where the transfer will be applied to prevent damage to the iron or heat press.
Applying the Transfer
Applying the transfer requires precision and the right temperature. Here's how to do it:
Using a Heat Press
Set the heat press to the recommended temperature for your transfer paper (usually around 375-400°F). Place the transfer face down on the shirt and press for the specified time (usually 20-30 seconds). Peel the paper while the transfer is still warm.
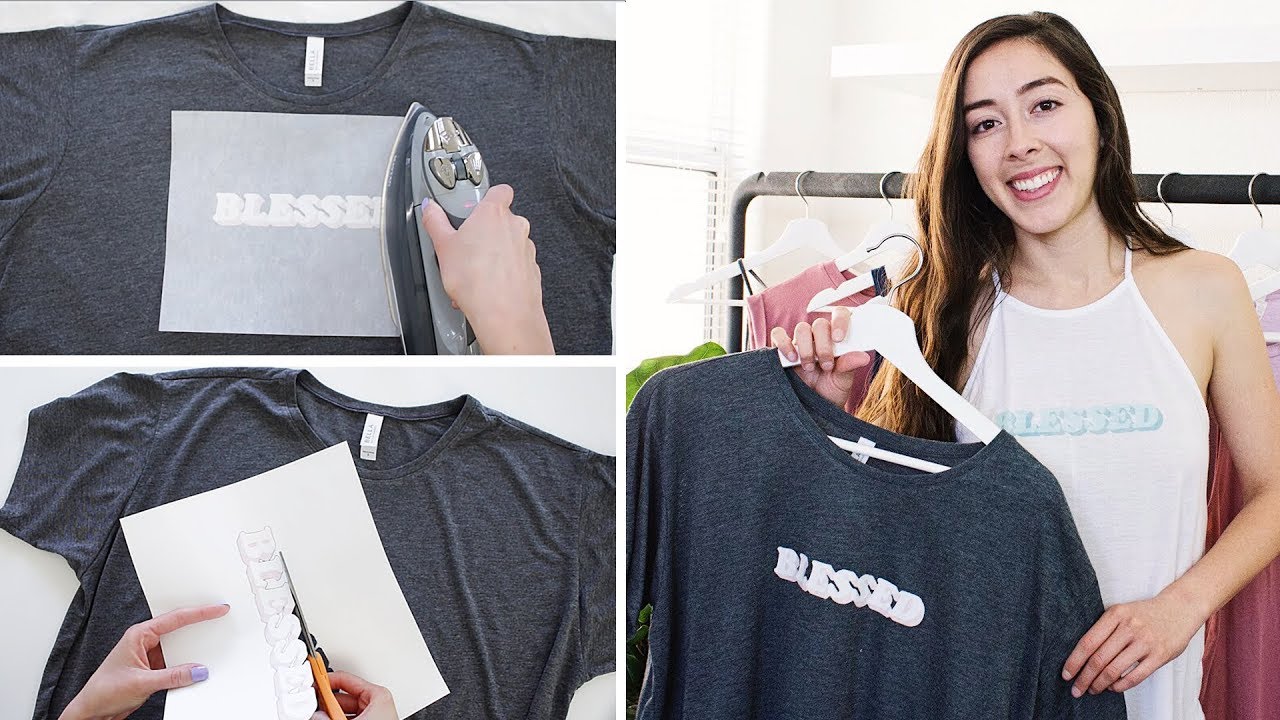
Using an Iron
Set your iron to the highest setting without steam. Place the transfer face down on the shirt and press firmly for 20-30 seconds, moving the iron in small circles. Allow the transfer to cool before peeling the paper.
Tips for Successful Transfers
To ensure your shirt transfers turn out perfectly every time, consider the following tips:
- Test your transfer on a scrap piece of fabric before applying it to your shirt.
- Follow the manufacturer's instructions for temperature and time settings.
- Use a pressing cloth to protect the transfer during application.
- Trim the transfer paper close to the design to minimize excess material.
Common Mistakes to Avoid
Even experienced transfer makers can fall into common pitfalls. Here are some mistakes to watch out for:
- Using the wrong type of transfer paper for your printer.
- Not reversing the design for dark fabrics.
- Applying too much or too little heat during the transfer process.
- Failing to properly prepare the shirt before application.
Frequently Asked Questions
Can I use shirt transfers on any type of fabric?
While shirt transfers work best on cotton and polyester blends, some transfers are designed for specialty fabrics like silk or nylon. Always check the compatibility of the transfer paper with your chosen fabric.
How long do shirt transfers last?
Modern transfers can last through multiple washes without fading or peeling, provided they are cared for properly. Always follow the care instructions for the specific transfer type.
Can I use a regular printer for shirt transfers?
Yes, most inkjet and laser printers can be used for shirt transfers as long as you use the appropriate transfer paper. However, for larger or more complex projects, investing in a dedicated printer may be beneficial.
Kesimpulan
Making shirt transfers is a rewarding and creative process that anyone can master with the right tools and techniques. From choosing the right materials to applying the transfers, each step plays a crucial role in achieving professional-quality results. By following the guidelines outlined in this article, you'll be well on your way to creating stunning custom designs.
We invite you to share your experiences and tips in the comments below. Feel free to explore our other articles for more insights into the world of custom printing and design. Happy crafting!