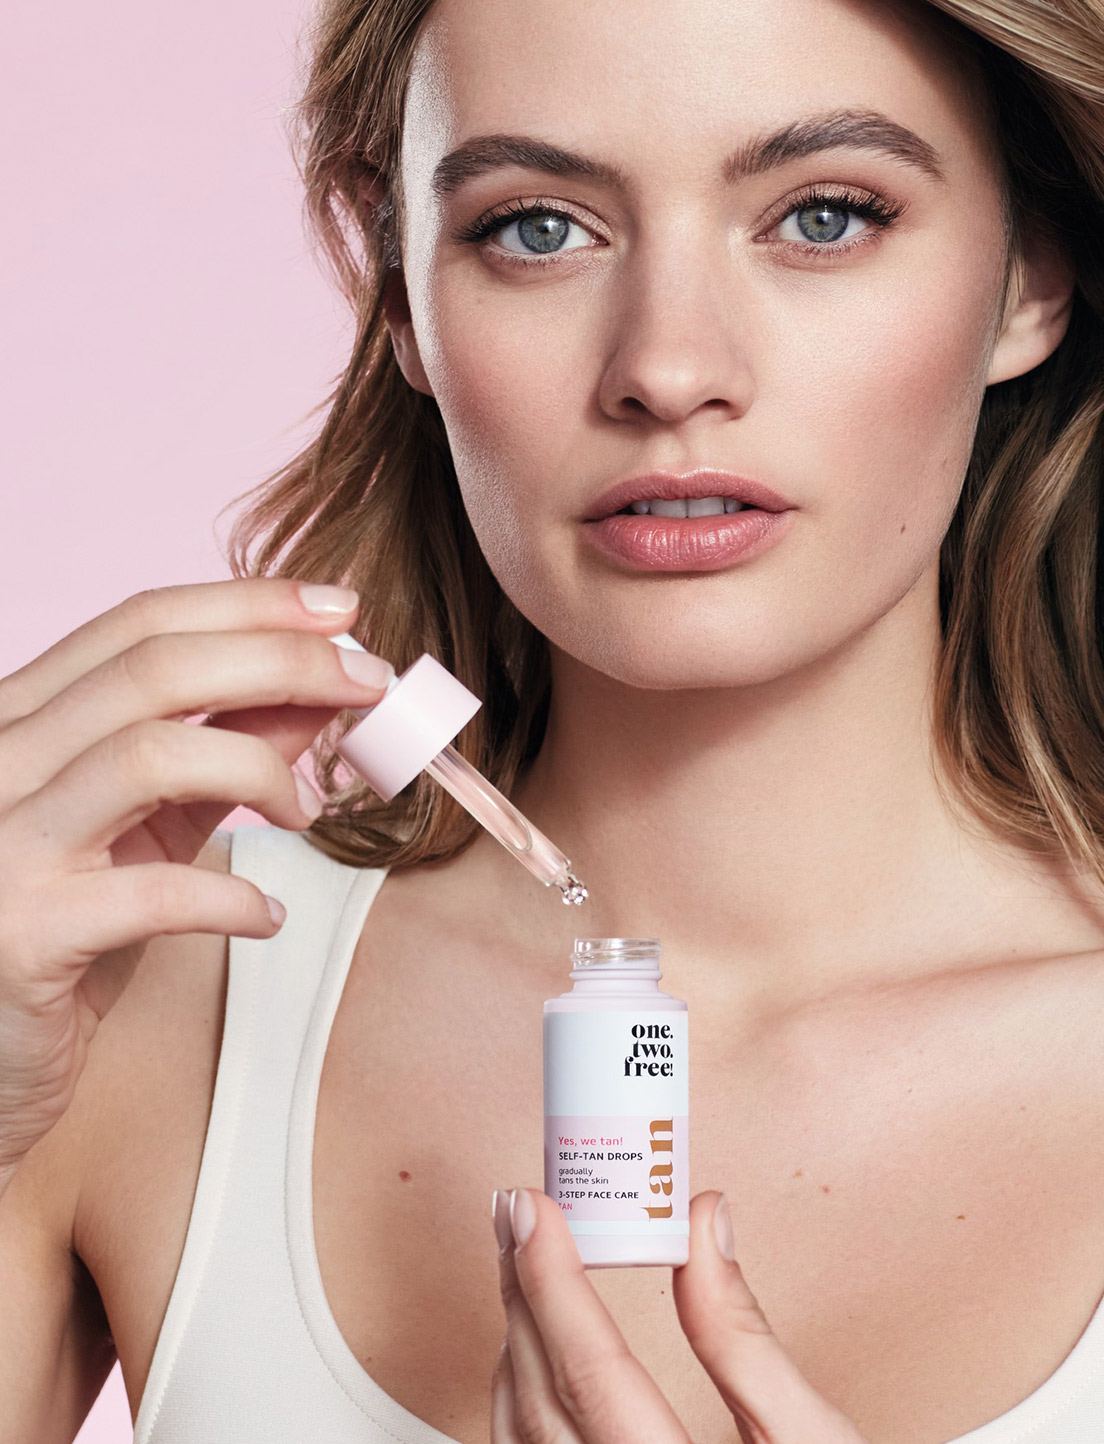
Self-tanning has become an increasingly popular method for achieving a sun-kissed glow without exposing your skin to harmful UV rays. Applying self-tan with gloves can significantly enhance the process by preventing unwanted staining on your hands, ensuring an even application, and delivering professional-looking results. Whether you're a beginner or an experienced user, mastering the art of self-tanning with gloves is a game-changer for your beauty routine.
Many people hesitate to try self-tanners due to concerns about uneven results or messy application. However, with the right tools and techniques, you can achieve flawless results from the comfort of your home. Self-tanning gloves are specifically designed to make the process easier, more controlled, and less intimidating. By following this guide, you'll learn everything you need to know about self-tanning with gloves, including tips, tricks, and expert advice.
This comprehensive article will cover everything from the benefits of using self-tanning gloves to step-by-step instructions for application, troubleshooting common issues, and maintaining your tan. By the end of this guide, you'll feel confident in your ability to achieve a streak-free, natural-looking tan that lasts for days.
Read also:Golden Mask 50 Unveiling The Secrets Of This Revolutionary Skincare Treatment
Table of Contents
- Introduction to Self-Tan with Gloves
- Benefits of Using Self-Tanning Gloves
- Choosing the Right Self-Tanning Tools
- Preparing Your Skin for Self-Tan
- Step-by-Step Guide to Applying Self-Tan with Gloves
- Expert Tips for Perfect Results
- Common Issues and How to Avoid Them
- Maintaining Your Self-Tan
- Recommended Self-Tanning Products and Gloves
- Conclusion and Final Thoughts
Introduction to Self-Tan with Gloves
Why Self-Tanning Has Become So Popular
In recent years, self-tanning has emerged as a safer alternative to traditional tanning methods. With the growing awareness of the dangers of sun exposure, more people are turning to self-tanners to achieve a radiant, golden glow. Self-tanning with gloves takes this process to the next level by providing a controlled, mess-free application experience. This method ensures that your hands remain stain-free, leaving you with a smooth and even finish.
What Are Self-Tanning Gloves?
Self-tanning gloves are specially designed disposable gloves made from materials that prevent the self-tanner from staining your hands. They are typically made from materials like latex or nitrile and are lightweight enough to allow for precise application. These gloves are often included in self-tanning kits or can be purchased separately, making them a convenient addition to your beauty routine.
The Importance of Proper Application
Applying self-tan with gloves is not just about preventing stains; it's also about achieving professional-looking results. The gloves help you distribute the product evenly, preventing streaks and patches. By following the right techniques and using high-quality tools, you can enjoy a flawless tan that lasts for up to a week.
Benefits of Using Self-Tanning Gloves
Using self-tanning gloves offers numerous advantages that make the self-tanning process more enjoyable and effective. Below are some key benefits:
- Stain-Free Hands: Gloves prevent the self-tanner from staining your palms and fingers, which is a common concern among users.
- Even Application: Gloves allow for a controlled and precise application, reducing the risk of streaks and uneven patches.
- Professional Results: With gloves, you can achieve salon-quality results at home, saving both time and money.
- Hygiene and Convenience: Disposable gloves are hygienic and easy to use, making them a practical choice for regular self-tanning sessions.
Choosing the Right Self-Tanning Tools
Types of Self-Tanning Gloves
When selecting self-tanning gloves, it's important to consider the material and fit. Popular options include:
- Latex Gloves: These are flexible and provide a snug fit, making them ideal for precise application.
- Nitrile Gloves: Nitrile gloves are durable and less likely to tear, making them a great choice for those who prefer a firmer grip.
- Microfiber Mitts: Some self-tanning kits come with reusable microfiber mitts that offer a softer application experience.
Other Essential Tools
In addition to gloves, you'll need a few other tools to ensure a successful self-tanning session:
Read also:Peace Tea Scan The Ultimate Guide To Unlocking Your Favorite Beverages
- Exfoliating Mitt: To remove dead skin cells and prepare your skin for even application.
- Blending Brush: For blending the product around tricky areas like the knees, elbows, and ankles.
- Tanning Towel: To prevent smudging and protect your clothing after application.
Preparing Your Skin for Self-Tan
Why Skin Preparation Matters
Proper skin preparation is crucial for achieving a flawless self-tan. Skipping this step can result in uneven application and shorter-lasting results. Follow these steps to prepare your skin:
- Exfoliate: Use a gentle exfoliating mitt to remove dead skin cells, paying extra attention to rough areas like the knees, elbows, and ankles.
- Moisturize: Apply a light, non-oily moisturizer to hydrate your skin. Avoid moisturizing areas like the knees and elbows to prevent streaks.
- Shave or Wax: If necessary, shave or wax at least 24 hours before applying self-tan to avoid irritation.
Best Practices for Skin Preparation
To ensure optimal results, follow these best practices:
- Avoid using heavy lotions or oils on the day of application.
- Wear old or dark clothing after application to prevent staining.
- Plan your self-tanning session in the evening to allow the product to develop overnight.
Step-by-Step Guide to Applying Self-Tan with Gloves
Step 1: Gather Your Tools
Before starting, make sure you have all the necessary tools within reach:
- Self-tanning gloves or mitts
- Self-tanning product
- Exfoliating mitt
- Blending brush
- Tanning towel
Step 2: Apply the Product
Follow these steps for a seamless application:
- Put on the self-tanning gloves to protect your hands.
- Apply a small amount of self-tanner to your palms and spread it evenly across your skin using gentle, circular motions.
- Work in sections, starting with your legs, arms, and torso, then moving to your face and neck.
- Use a blending brush to apply the product around the hairline, ears, and other delicate areas.
Step 3: Let It Develop
Allow the self-tanner to develop according to the instructions on the product packaging. Avoid showering or sweating during this time to ensure optimal results.
Expert Tips for Perfect Results
Here are some expert tips to help you achieve a flawless self-tan:
- Less Is More: Start with a light layer of self-tanner and build up gradually to avoid an unnatural orange hue.
- Test on a Small Area: Before applying to your entire body, test the product on a small patch of skin to ensure it suits your skin tone.
- Wear Loose Clothing: After application, wear loose, dark clothing to prevent the product from transferring onto your clothes.
Common Issues and How to Avoid Them
Problem: Uneven Application
Solution: Ensure your skin is properly exfoliated and moisturized before application. Use gloves to distribute the product evenly.
Problem: Streaky Results
Solution: Avoid over-applying the product and use a blending brush to smooth out any streaks around the edges.
Problem: Orange Tones
Solution: Start with a lighter formula and gradually build up your tan. Avoid using too much product on areas prone to discoloration.
Maintaining Your Self-Tan
How to Extend the Life of Your Tan
To make your self-tan last longer, follow these maintenance tips:
- Moisturize Daily: Keep your skin hydrated to prevent dryness and flakiness.
- Avoid Harsh Soaps: Use gentle, pH-balanced cleansers to wash your skin.
- Wear Sunscreen: Protect your skin from UV rays to maintain an even tan.
Recommended Self-Tanning Products and Gloves
Here are some top-rated self-tanning products and gloves to consider:
- St. Tropez Self Tan Express Gradual Tan Lotion: Offers a natural-looking tan with minimal streaking.
- James Read Self-Tan Mitt: A reusable microfiber mitt for smooth and even application.
- Clarins Gradual Self-Tanning Moisturizer: Combines hydration with a subtle sun-kissed glow.
Conclusion and Final Thoughts
Self-tanning with gloves is a simple yet effective way to achieve a flawless, sun-kissed glow without the risks associated with traditional tanning methods. By following the steps outlined in this guide, you can enjoy professional-quality results from the comfort of your home. Remember to prepare your skin thoroughly, use high-quality tools, and maintain your tan with regular moisturizing.
We encourage you to share your self-tanning experiences in the comments below and explore our other beauty-related articles for more tips and tricks. Don't forget to bookmark this page for future reference and spread the word by sharing this guide with your friends and family!